GNUMail User Guide
Version 1.0pre1
Mr. Dennis Leeuw
Pieter Bothstraat 32
3531 GZ
Utrecht
NL
<dleeuw@made-it.com>
Copyright © 2005 Dennis Leeuw
Permission to use, copy, modify and distribute this Guide and its accompanying documentation for any purpose and without fee is hereby granted in perpetuity, provided that the above copyright notice and this paragraph appear in all copies.
The copyright holders make no representation about the suitability of this Guide for any purpose. It is provided "as is" without expressed or implied warranty.
- Table of Contents
- 1. Introduction
- 2. Creating an account
- 3. Working with GNUMail
- 4. Mail Preferences
Chapter 1. Introduction
![]()
The GNUMail User Guide you are now reading is written for the 1.2.x release version of GNUMail.
Chapter 2. Creating an account
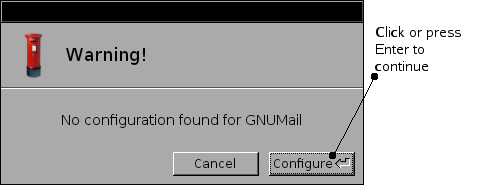
When you start GNUMail for the first time, there is no configuration it can use. So it warns you about that.
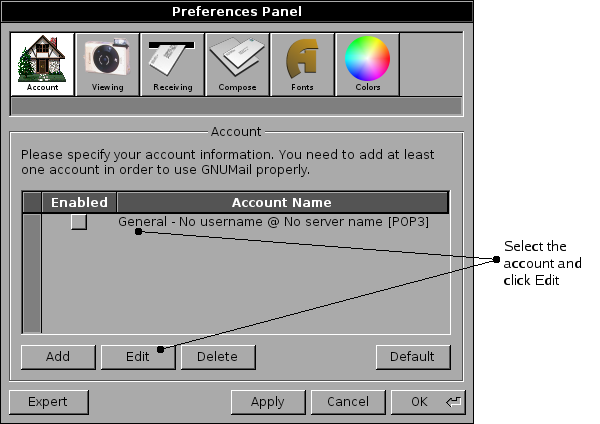
Per default there is a General account, this is just an example and we will replace it with our account information:
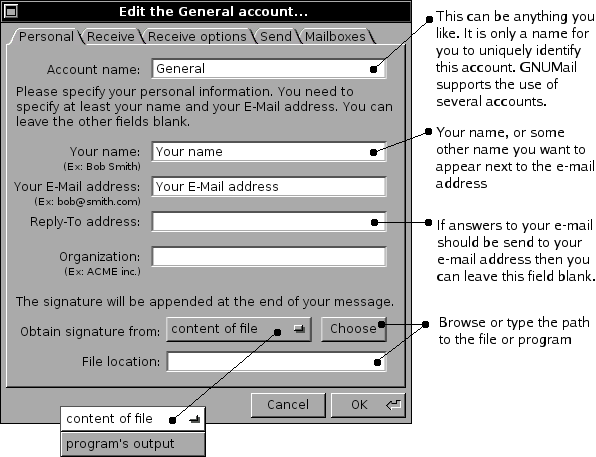
The Personal tab
The Receive tab
When you are done, select the Receive tab.
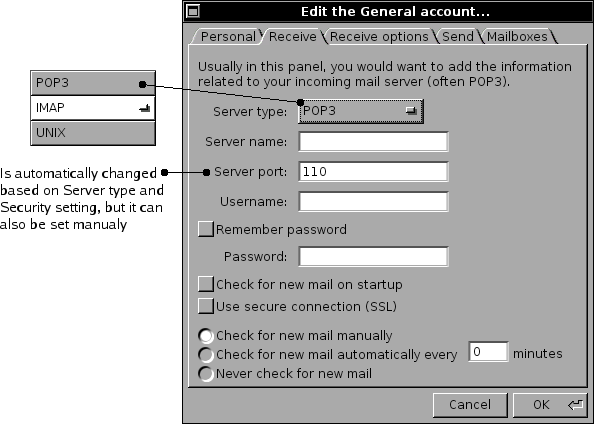
Server type. The Server type can be POP3, IMAP or UNIX. Your Internet Service Provider (ISP) or your local system administrator should be able to tell you what to use. Changing the Server type will also change the Server port. The default is almost always correct. Only change the Server port setting if you know what you are doing. If you are working on a computer that has its own mailserver, so mail is stored locally choose UNIX.
Server name, Username and Password. Here also your ISP or your administrator should be able to answer these questions.
If you can access your mailserver via SSL, do so. SSL encrypts your data before it is being send to and from the server, which is also true for e.g. your password. Instead of sending it as a readable word to the server, it encrypts it first. This way the chances of someone else obtaining your password are minimized.
The Receive options tab
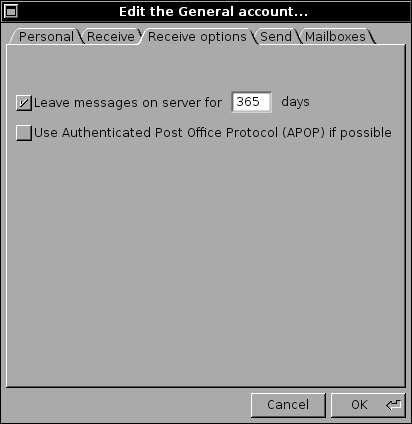
POP3 Receive options
IMAP Receive options
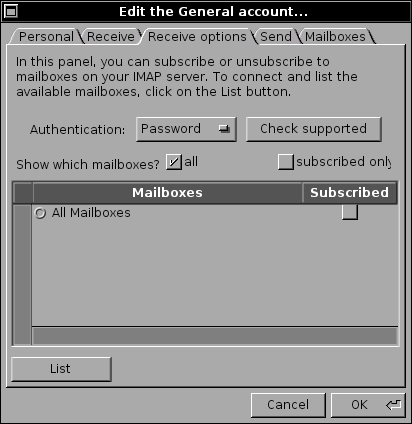
First click the List button. This will use the account settings from the previous tab to collect a list of files and directories which might be selected as mailboxes. The dot before all mailboxes changes and you can now click it to open the list.
Then skip due to bugs...
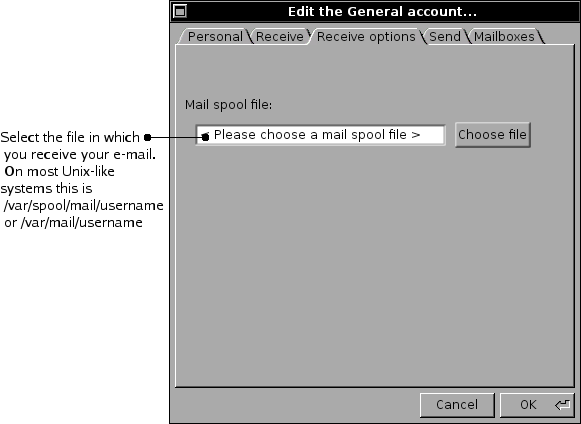
UNIX Receive options
The Send tab
Go to the Send tab.
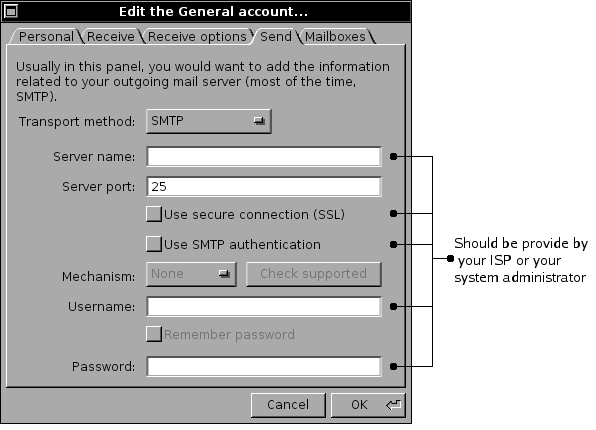
Transport method. The options for Transport method are SMTP and Mailer. Most people will use SMTP to send e-mail.
Server name. Here also your ISP or your administrator should be able to answer this question.
The Mailboxes tab
The last tab is Mailboxes
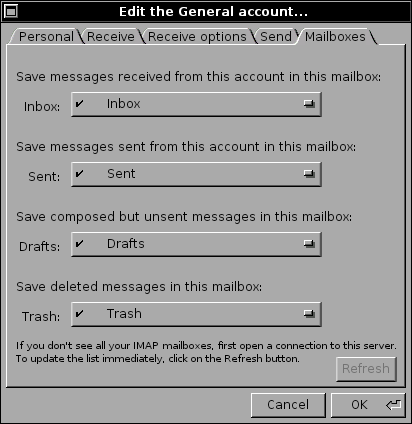
When you are done click Ok and check the enable box before the account name.
Click the OK
Chapter 3. Working with GNUMail
Start by selecting the Mailboxes button:

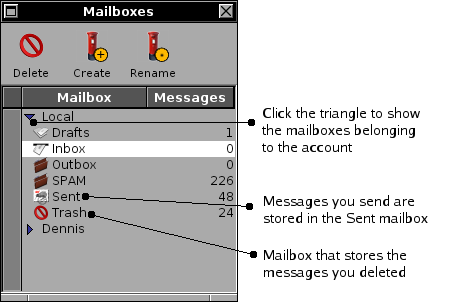
Open your newly created account and select the Inbox.
Reading messages
To indicate that you have new mail waiting for you, the mail icon changes.
![]()
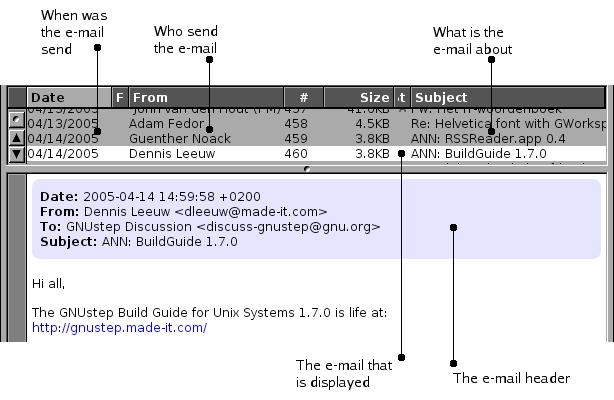
An e-mail consists of two parts: the mail header, and the body. The header describes an e-mail: where did it come from, to whom was is addressed, what is it about and a lot more. Per default only the most important headers are shown.
The actual message is called the body of an e-mail. It contains the data that is send to you. The body can contain just the text some one wrote to you, but that can also be one or more attachments. Attachments are documents that are not part of the text, but files that are attached to the message, like a PDF.
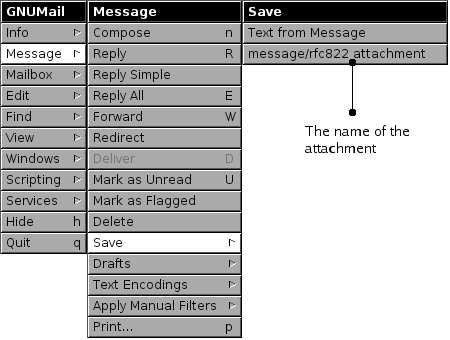
You can save the entire message or just the attachment.
To go to the next message use Previous Unread and Next Unread or click the next message you want to read [META]:commands, img menu with link to keyboard shortcut.
Per default the e-mail is sorted by date. To sort you e-mail another way, click on the column header.

If you want the column header to have less entities, you could configure it completely to you likeing through Columns submenu from the View menu.
When you have a long mail discussion it is called a mail thread. This might get complex if you have a couple of those threads going on. Easier would be to have all the e-mail belonging to one thread near eachother. The command menu has a special function you could use for that, it is called Thread Messages and can be found in the View submenu.
[META]:img threaded mail header
[META]:all headers (what is it good for from a users perspective?)
Writing messages

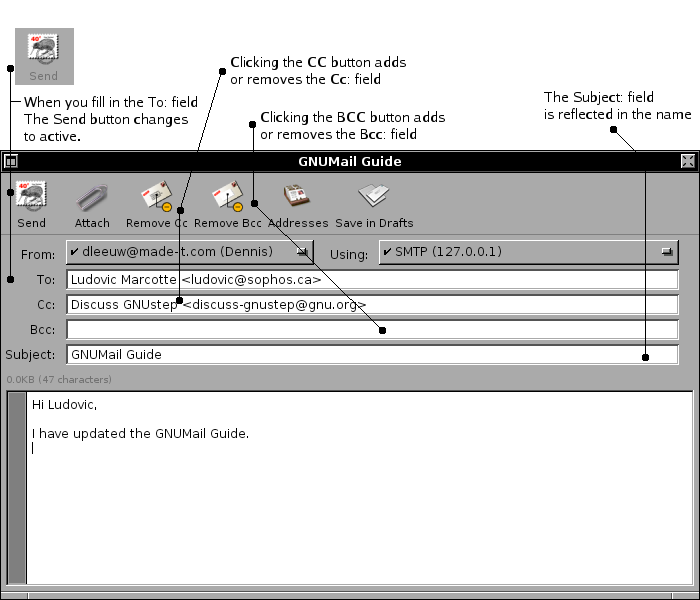
The Subject-field should briefly indicate what the content of the message is. It should preferably be less then six words, and make sure the receiver of your e-mail only has to read the subject to know what your e-mail is about. Never use a subject like: "Hello" or "Me again", also never leave a Subject-field blank. A lot of the modern e-mail filters recard messages with empty Subject-fields as SPAM.
The To-field, is a required field and must contain an e-mail address. You can add more e-mail addresses by using commas (,).
Another method to address more people is by using the CC-field (Carbon Copy). It is good practise to use the To-field for addressing people that should read your message, and the CC-field only for the ones that need to be notified. The ones in the CC-field are thus not required to read the mail.
And the last field used for sending e-mail is the BCC-field (Blind Carbon Copy). Addresses in the BCC-field are not visible to the ones mentioned in the To- and CC-fields.
If you are sending an e-mail to a lot of people use the BCC-field. It prevents the spreading of the e-mail address of other people and you guarantee the privacy of others.
Addresses
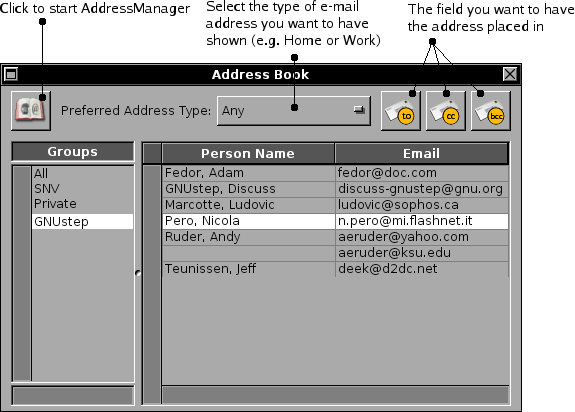
When you have AddressManager installed the e-mail addresses are shared with GNUMail. Clicking the Addresses button from the task bar, will show you the e-mail addresses available from AddressManager.

Attachements
Not everything can be expressed in words. You probably know the phrase 'A picture can tell a thousand words'. Although you should try to minimize the use of attachments, they are sometimes unavoidable.
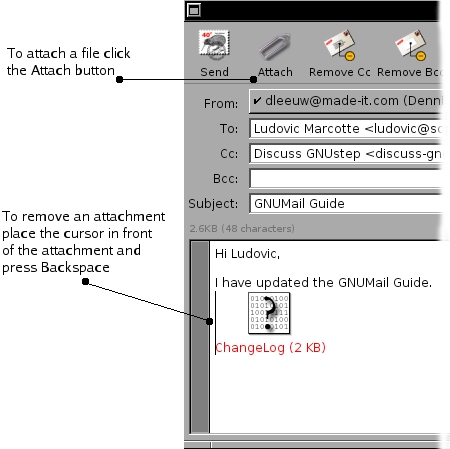
To attach a file, click the Attach button in the taskbar. A browser window will show up and you can select a file to attach to your e-mail.
Answering mail
To send an answer to an e-mail you received select the e-mail and click the Reply button:

All the text in the e-mail will be preceded by a > symbol. This creates a clear distinction between what you are writting and the original text. Creating a reply on a reply will thus get >> in front of the original text, and a > for the text of the first reply:
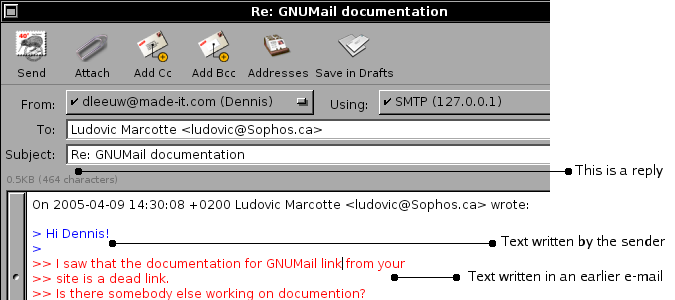
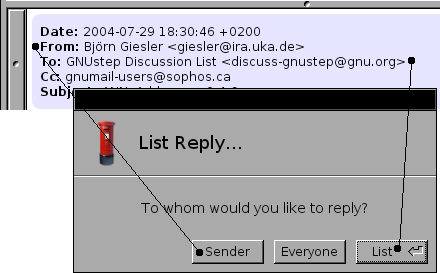
If you clicked the reply button on an message that came from a mailing list GNUMail will ask you what you want to do:
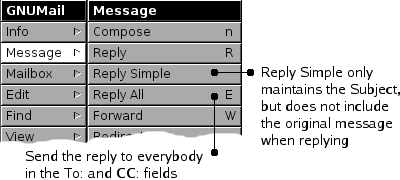
Another way to create a reply is through the command-menu:
Forwarding mail
The forward mail function gives you the ability to resend a message to someone else. For the new receiver it appears as if the message is coming from you, and you would not get the identation you get when replying to an e-mail.

Deleting mail

Select the message or messages you want to delete and hit the delete button. The delete command from the command menu also deletes the message(s). The keyboard equivalent is the Delete or Del key.

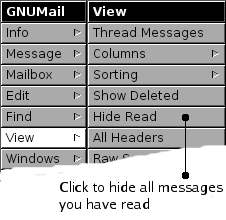
Deleted mail is greyed out. This can get hard to read. To remove the deleted e-mail from the view use the menu to select:
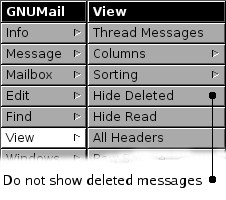
The button in the command menu will change to Show deleted to reverse the process.
To get a message back you deleted. Select the deleted message and click the Delete from the taskbar.
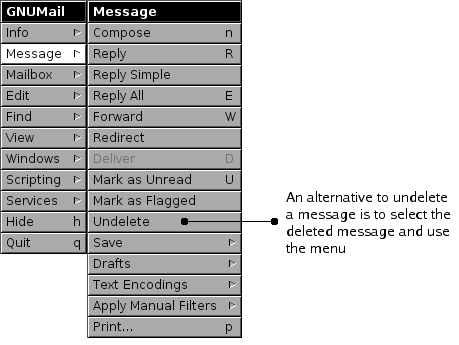
The messages are not actually deleted from the system. They are only marked for deletion, and thus made grey. To actually delete the e-mails from you system use the Compact... or K. This will remove the messages. It creates more diskspace, but you will not be able to revert this.
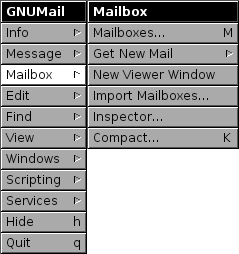
Organizing mail
While going through you Inbox it might happen that you encounter an e-mail that needs your attention, but you can not act on it right away. An easy way to remember that you should go back to this e-mail is to flag the one.

To enhance your overview over a certain mailbox, you can hide the messages that you have read and only show the new e-mails.
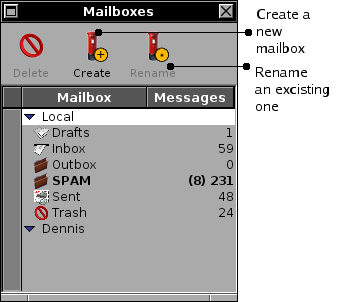
Good e-mail maintenance gets more important when your amount of e-mail grows. There are simple measures like flagging a message, or hiding of read or deleted messages, but better would it be to treat your e-mail like an archive. When a message does not need your attention anymore, but you do not want to throw it away you should save it in a mailbox.
Chapter 4. Mail Preferences
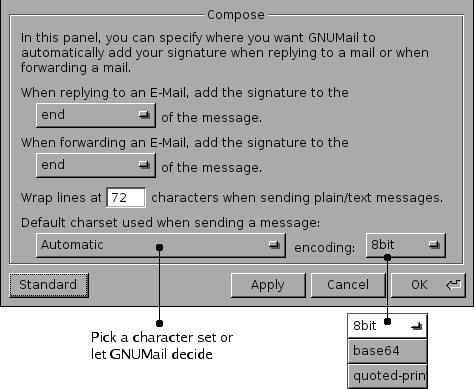
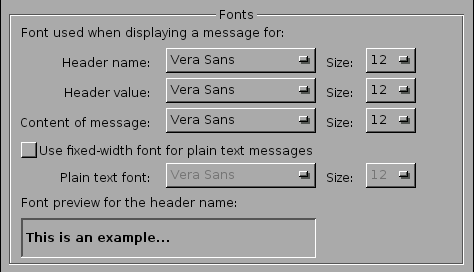
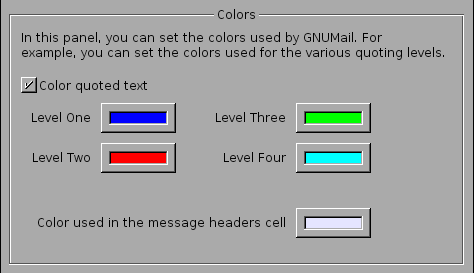
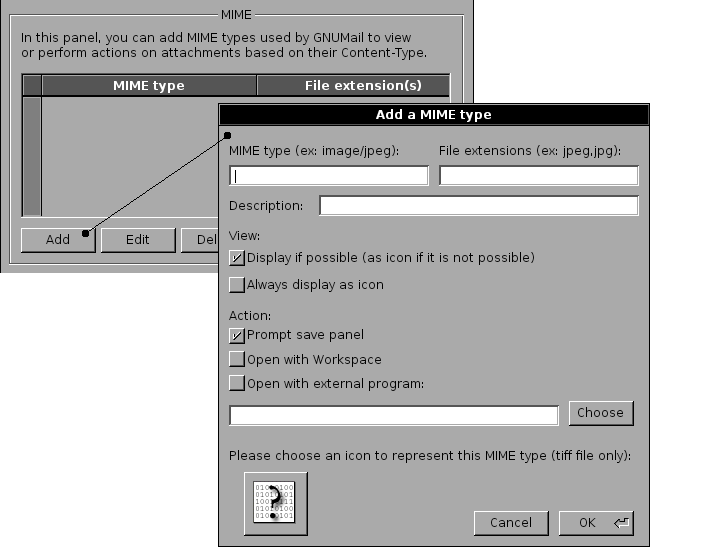
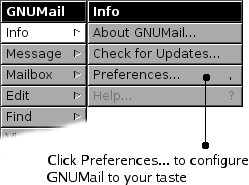
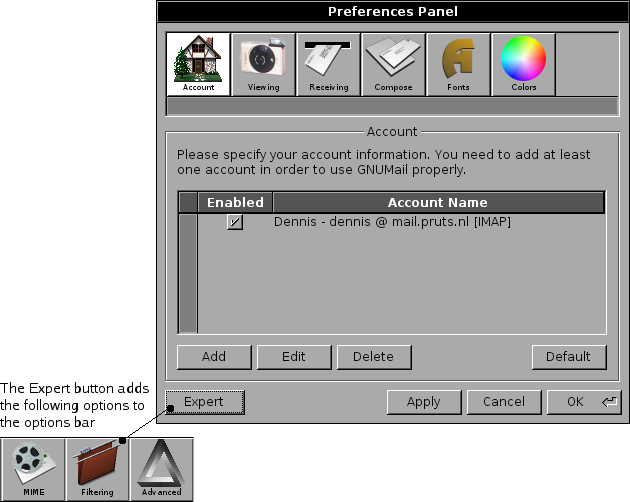
To customise your GNUMail experience there are some Preferences you can set. To access these settings and to change them, you should access the Info... from the menu.
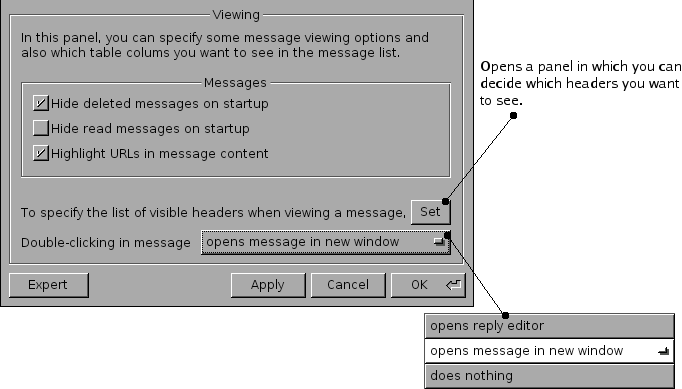
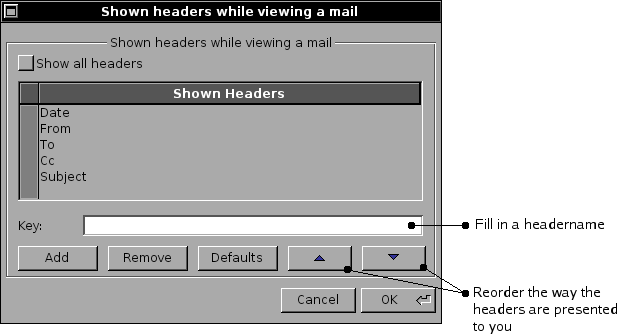
Viewing
Filtering
From the Expert options choose the Filtering item:
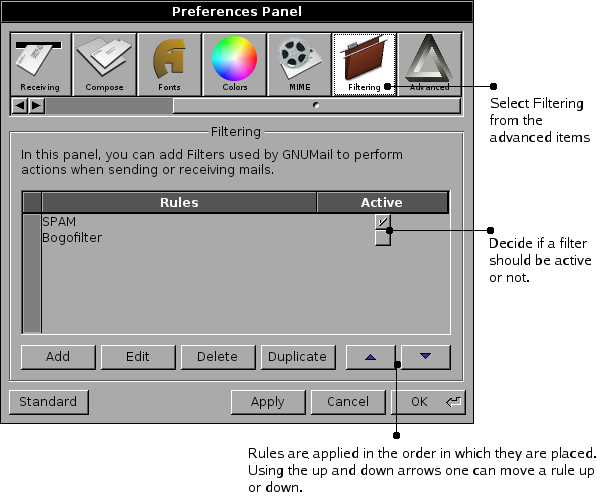
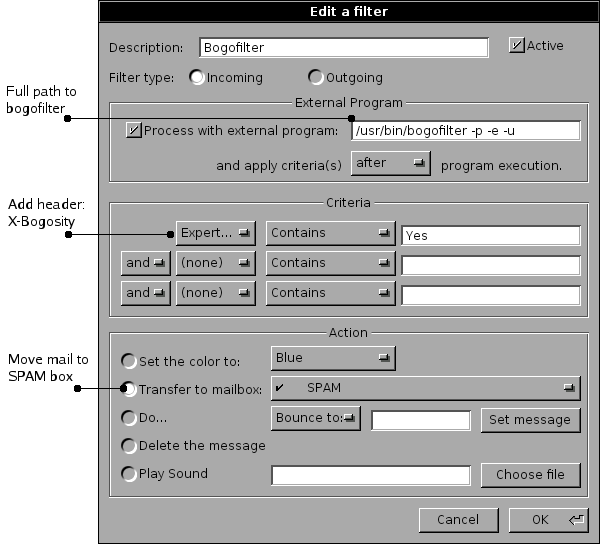
To understand how to create your own filter or how to modify one, we have to click add filter and run through its options.
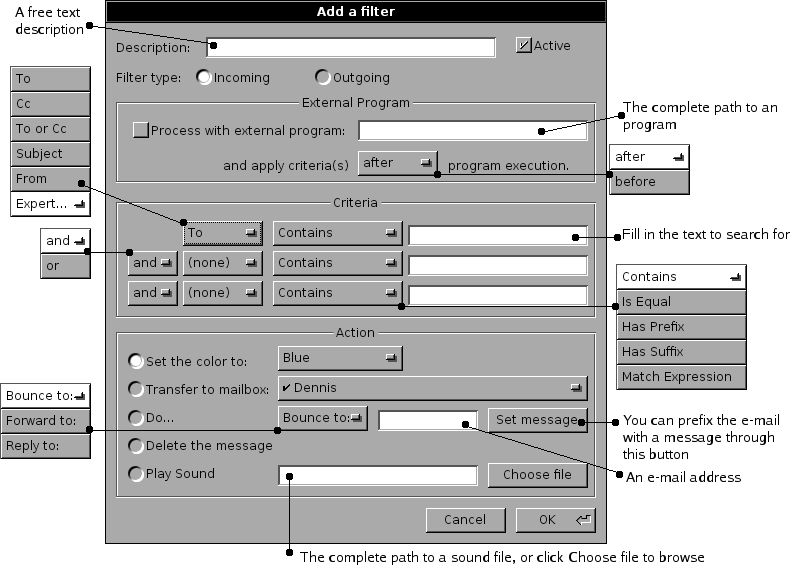
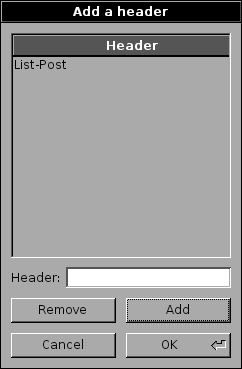
With the Expert... option in the Criteria section you can create your own headers. After selecting Expert... you are presented with a panel in which you can add or remove a specific header description for which the GNUMail should search.

The remainder of this section gives you two examples, in the first one we will be filtering virusses by using ClamAV, and with the second one we will be filtering SPAM using the Bogofilter.
SPAM filtering
In you Local account create a mailbox called SPAM, and collect as much spam as you can in this box.
To train bogofilter for the first time you need about 100 SPAM en 100 non-spam e-mails; the more the better.
bogofilter -s < ~/Mailboxes/SPAM bogofilter -n < ~/Mailboxes/Inbox |
Once you have done this you can empty the SPAM box. This one will be used to collect all e-mail that is detected as being SPAM. It is a good habit to check the collected e-mail once in a while, if the filter is still correct. Spammers learn and so the rules of the game changes every time. If the collected SPAM is actual spam, you can throw it away.
Now that we have created an initial database of SPAM and HAM, we can create a new filter like this:
